The smell of fresh lemon and garlic hitting the food processor at 6 p.m. on a Saturday means one thing—a homemade hummus sharing platter recipe is coming together for whoever’s arriving in the next hour. I’ve watched crowds go quiet the moment this gets set down, then watched the same crowd demolish it in under 20 minutes. This isn’t about luck; it’s about building something worth fighting over before the main course even lands.
A homemade hummus sharing platter recipe is the ultimate easy crowd dip that doesn’t require you to own a catering license or spend your entire afternoon in the kitchen. You get that restaurant-quality Mediterranean spread without the restaurant markup, and it’s ready in under 20 minutes total. This particular summer appetizer has become my answer to every “what should I bring” text message.
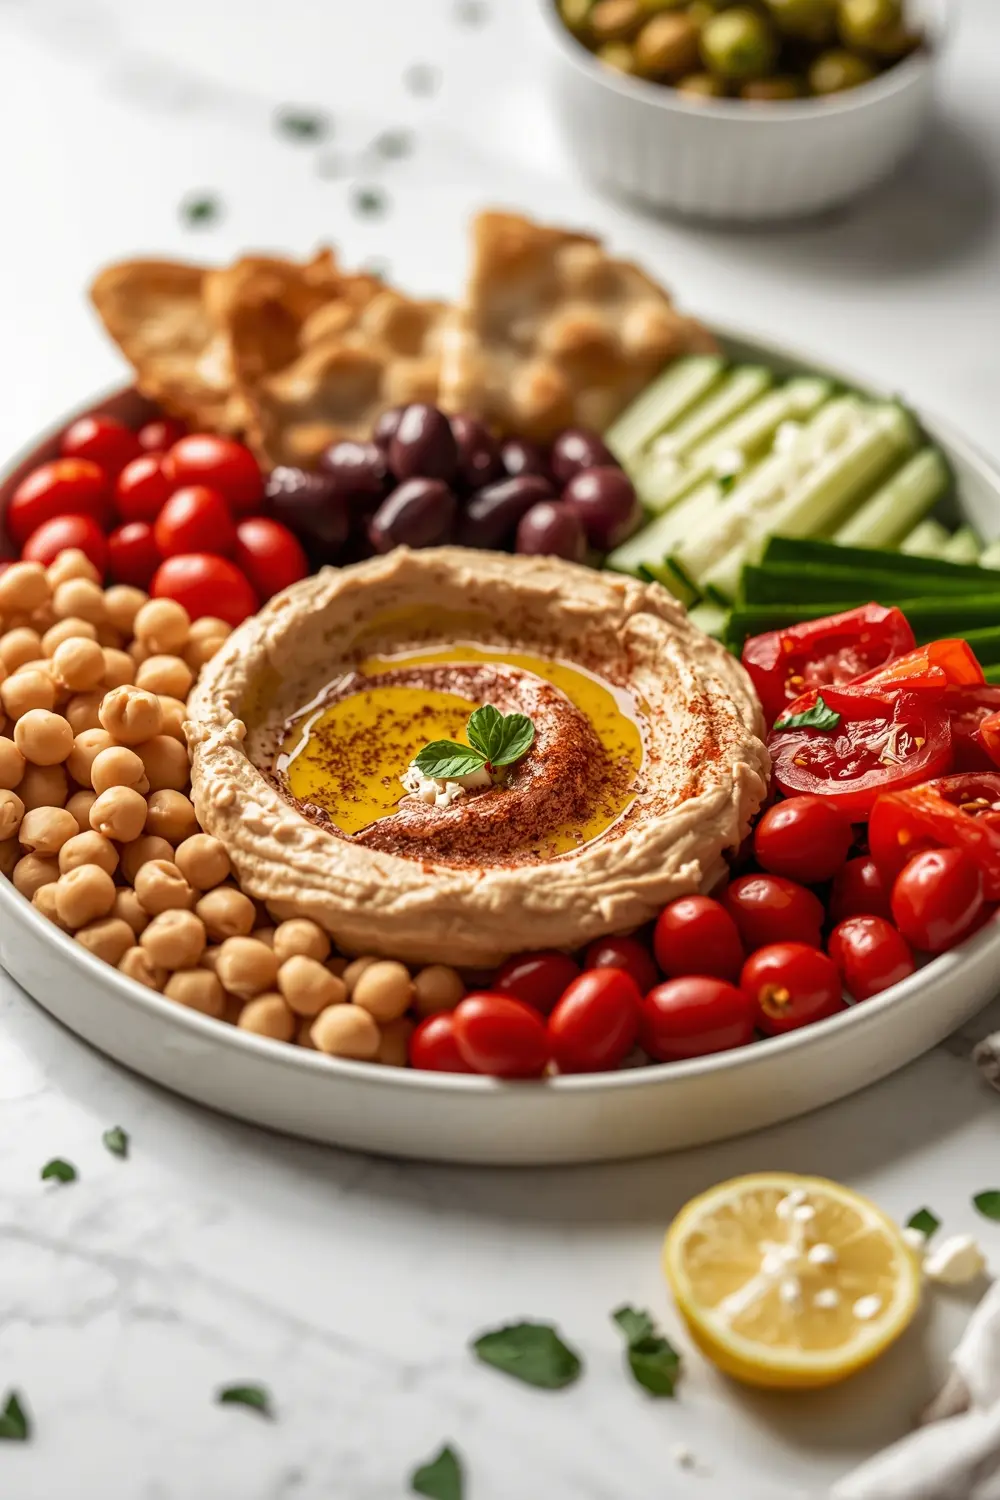
The trick is adding the tahini before the oil—most recipes do it backward, which leaves you with broken texture instead of that spoonable cloud you’re after. You’re building layers: the warm chickpea base, the cold vegetable crunch, the salt-forward olives, the cool feta scatter. A sharing summer dip works because every component does its job without needing permission from the others. Sandra once watched a group of eight people stand around this platter at a Fourth of July gathering—nobody sat down, nobody moved—for almost the entire first hour.
This is the kind of party sharing platter that makes you look like you planned something when really you just trusted a process. Save this now—you’ll use it before August ends.
Why this Mediterranean chickpea platter works
What makes a homemade hummus sharing platter actually stick around instead of getting picked at? The answer lives in contrast.
- The processor-smooth center sits next to raw vegetable snap that doesn’t soften.
- The oil-glossed surface catches light, signaling abundance before anyone tastes a single bite.
- Olives and feta anchor the platter flavor-wise because they’re aggressive enough to stand next to tahini.
- Pita bread moves from side dish to essential tool, which means people eat more of everything.
A homemade hummus sharing platter succeeds because it doesn’t pretend to be one thing. I believe this works better than a single-dip setup because your guests aren’t bored after three bites—they’re discovering new combinations on the fourth, fifth, and seventh bite.
|
Prep
15 minutes
|
Cook
5 minutes
|
Cal
280
|
Serves
8 servings
|
Cuisine
Mediterranean
|
Ingredients for homemade hummus sharing platter recipe

- 2 cans chickpeas, drained and rinsed
- 1/4 cup tahini
- 3 tbsp fresh lemon juice
- 1 large garlic clove, minced
- 2 tbsp extra-virgin olive oil, plus more for drizzling
- 1 tsp ground cumin
- 1/2 tsp smoked paprika
- 1 cup pita bread, cut into wedges
- 1 cup cherry tomatoes, halved
- 1 cup cucumber, sliced into sticks
- 1/2 cup roasted red peppers, sliced
- 1/2 cup kalamata olives, halved
- 1/4 cup feta cheese, crumbled
I know the tahini sometimes feels like the wildcard ingredient—you either have it or you don’t, and most people think they don’t. Here’s what actually works: cashew butter or almond butter can step in when tahini isn’t sitting in your cupboard, though the flavor shifts from nutty-forward to slightly sweeter. The lemon juice is non-negotiable because it’s what keeps the homemade hummus sharing platter from tasting flat, so if you’re thinking about skipping it, you’re going to regret it the moment you taste it without acid.
The beauty of this easy crowd dip setup is that every vegetable here can bend to what’s in your crisper drawer. Roasted carrots work. Radishes work. Bell pepper strips work. What matters is that you keep something crunchy and something cold against that warm processor-spun center. This homemade hummus sharing platter lives or dies by texture contrast, so don’t go all soft vegetables on me.
Let’s get into how you actually build this thing.
Step-by-step Mediterranean dip instructions
1. Add the drained chickpeas, tahini, lemon juice, minced garlic, cumin, and smoked paprika to your food processor. Pulse first—I learned this the hard way when I hit blend full-speed and ended up with chickpea dust instead of texture. You want the mixture to move around the bowl, not stick to the sides in a panicked clump.
2. Stream the 2 tablespoons of olive oil through the feed tube while the processor runs at medium speed. This is where the magic happens: the oil emulsifies into the mixture, creating that cloud-like consistency that makes people close their eyes while eating. Don’t pour it all in at once because you’ll break the texture and end up with grainy instead of smooth.
3. Taste, then season with salt to your preference. I usually add about 1/2 teaspoon, but everyone’s salt tolerance is different—taste before you commit. The lemon juice will have already begun the preservation process, so this homemade hummus sharing platter stays fresh longer than you’d expect in a refrigerator.
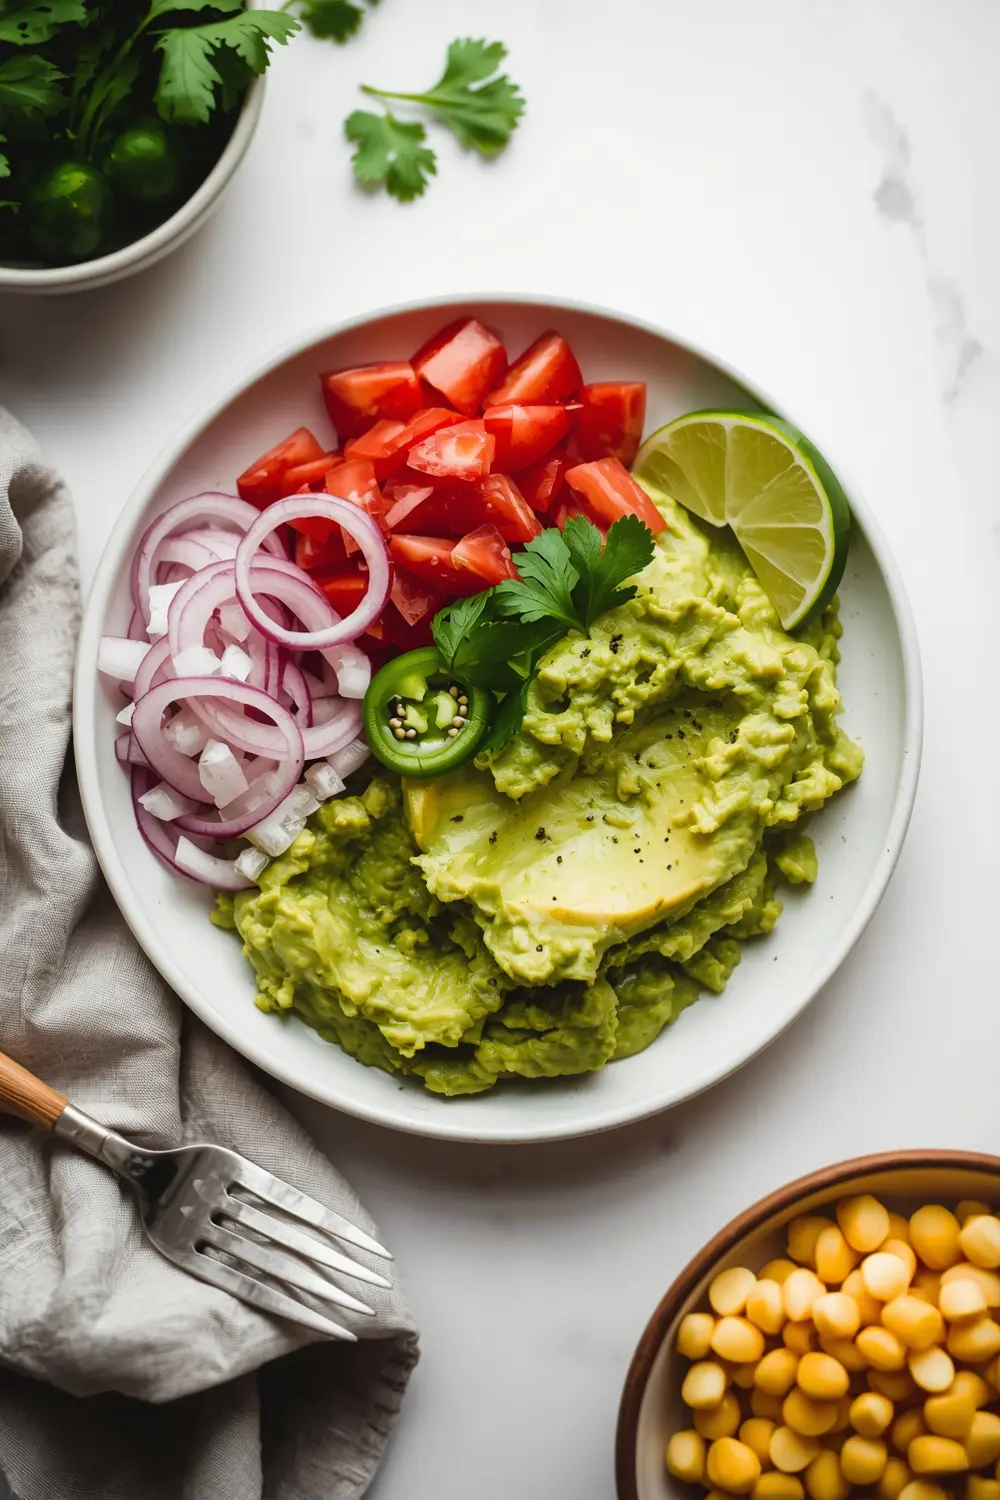
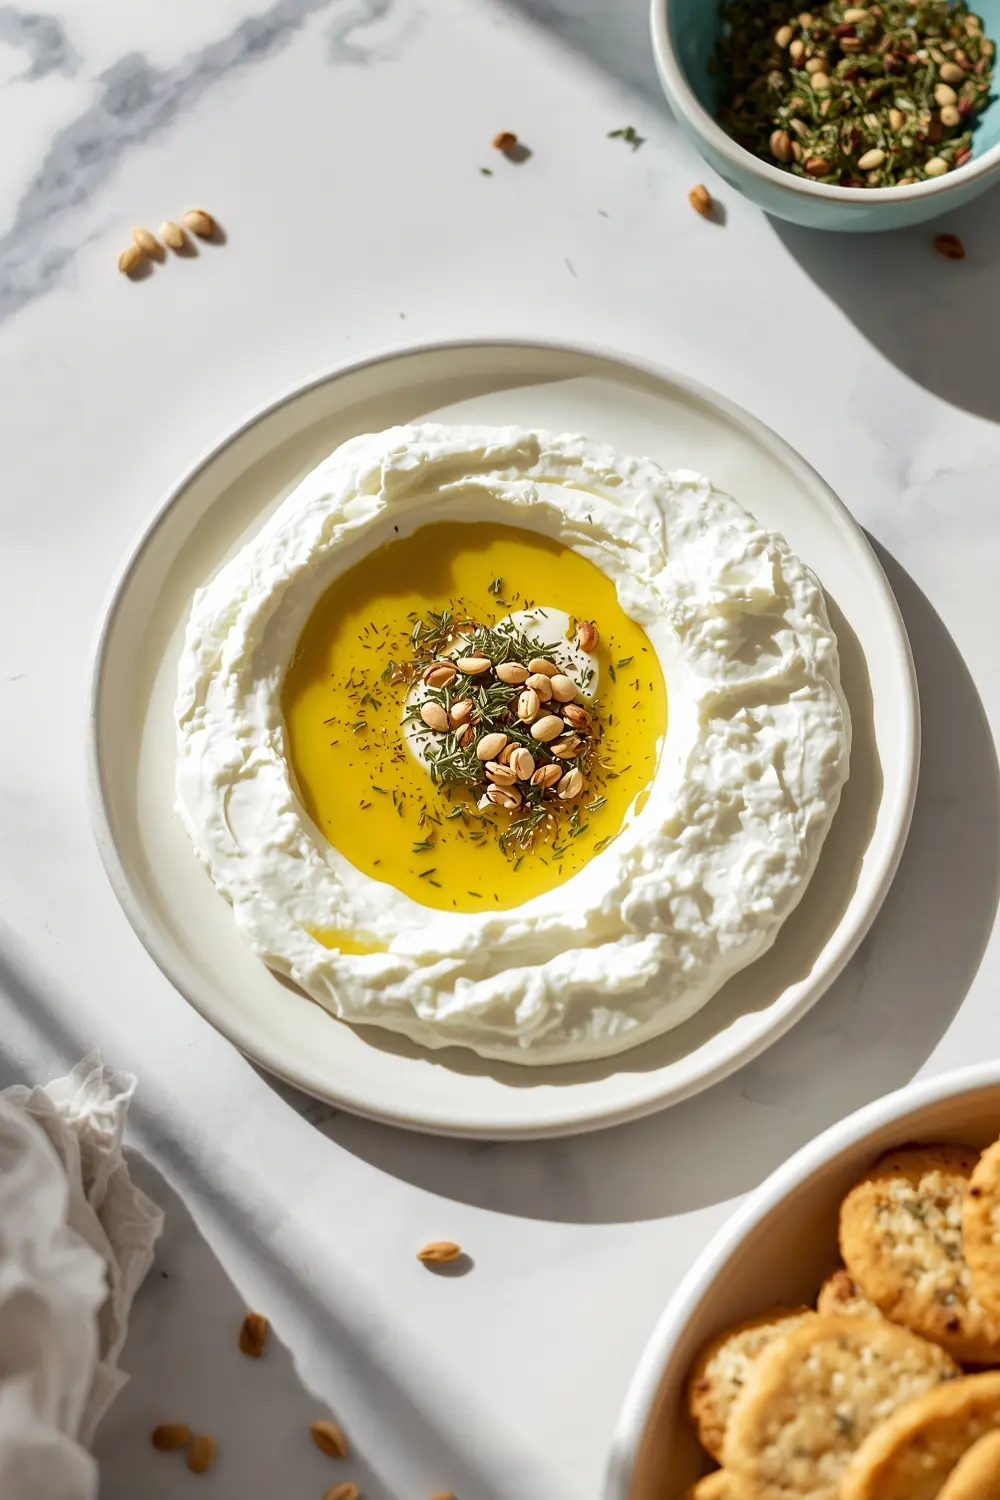
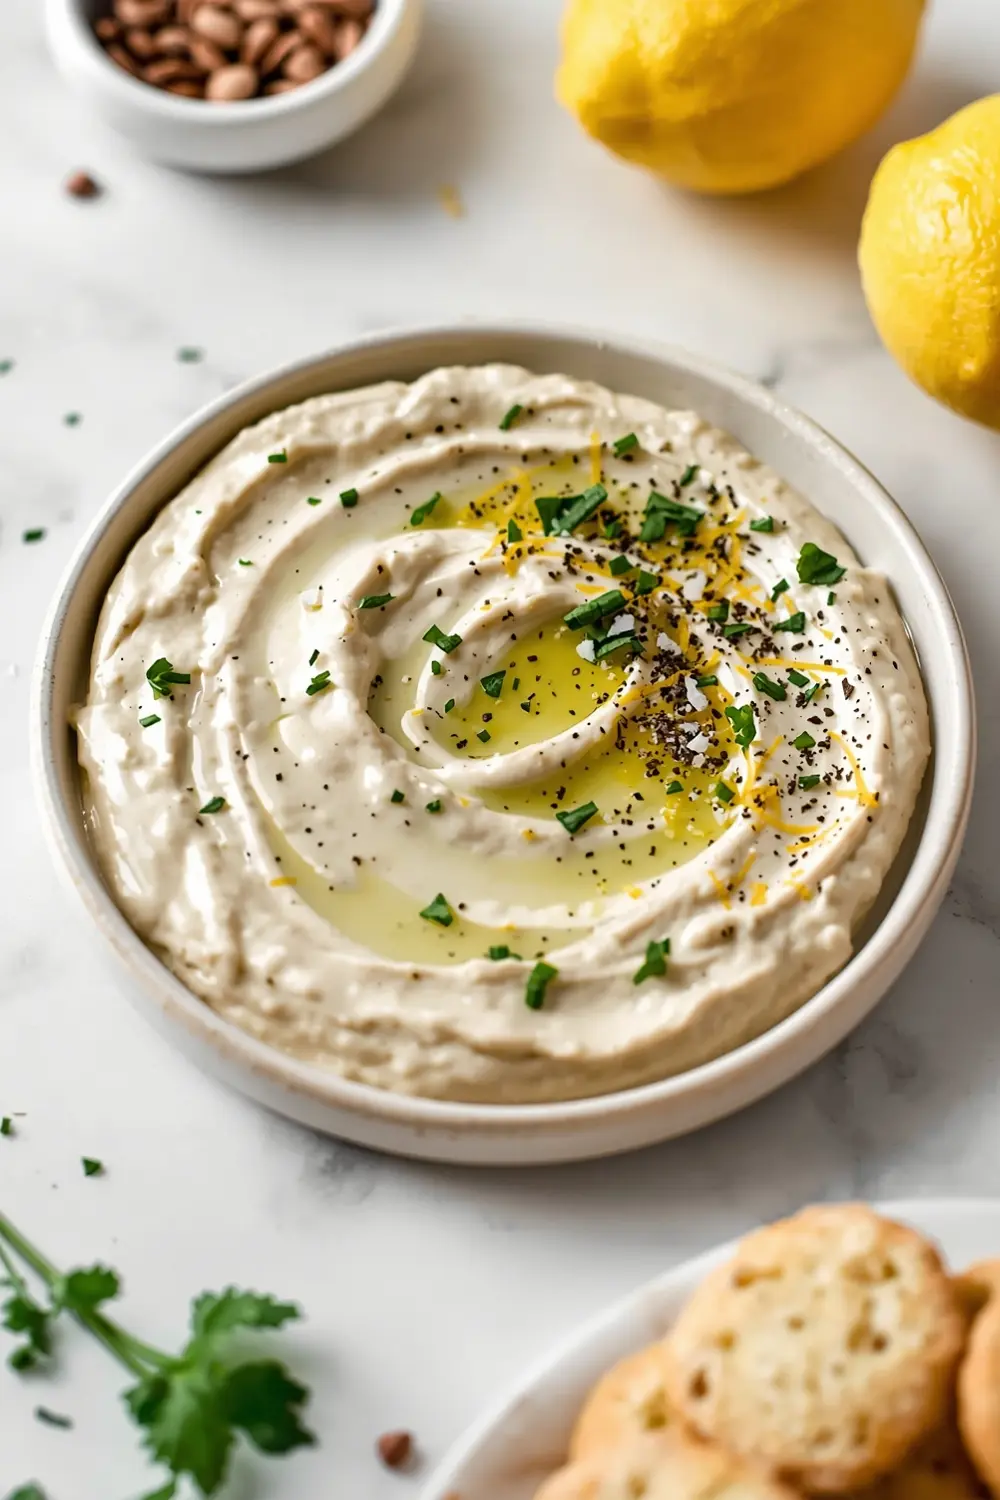
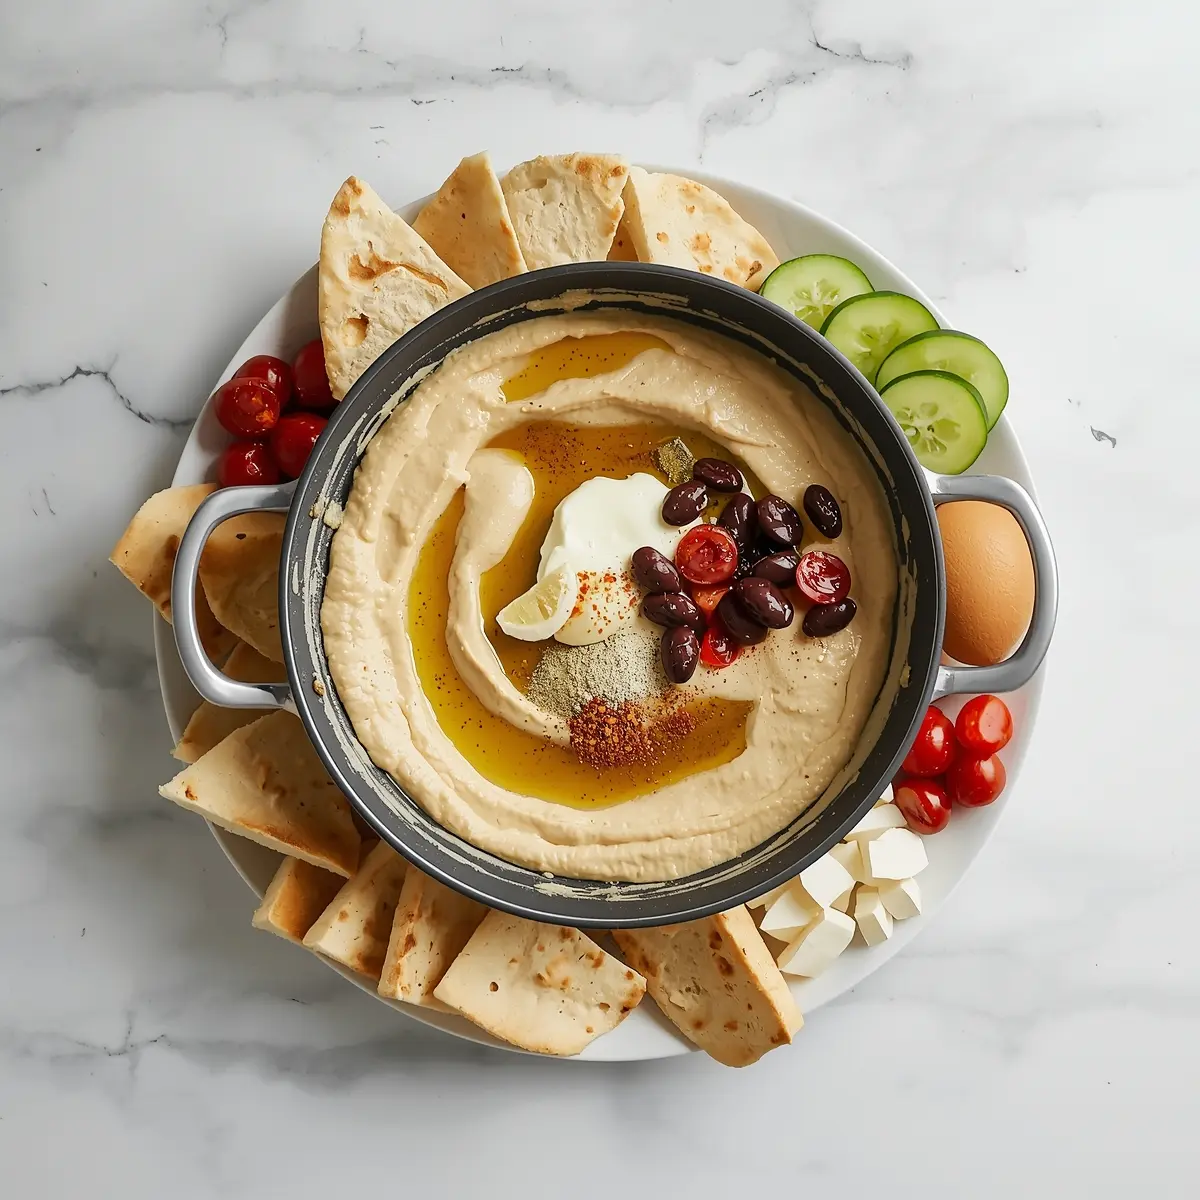
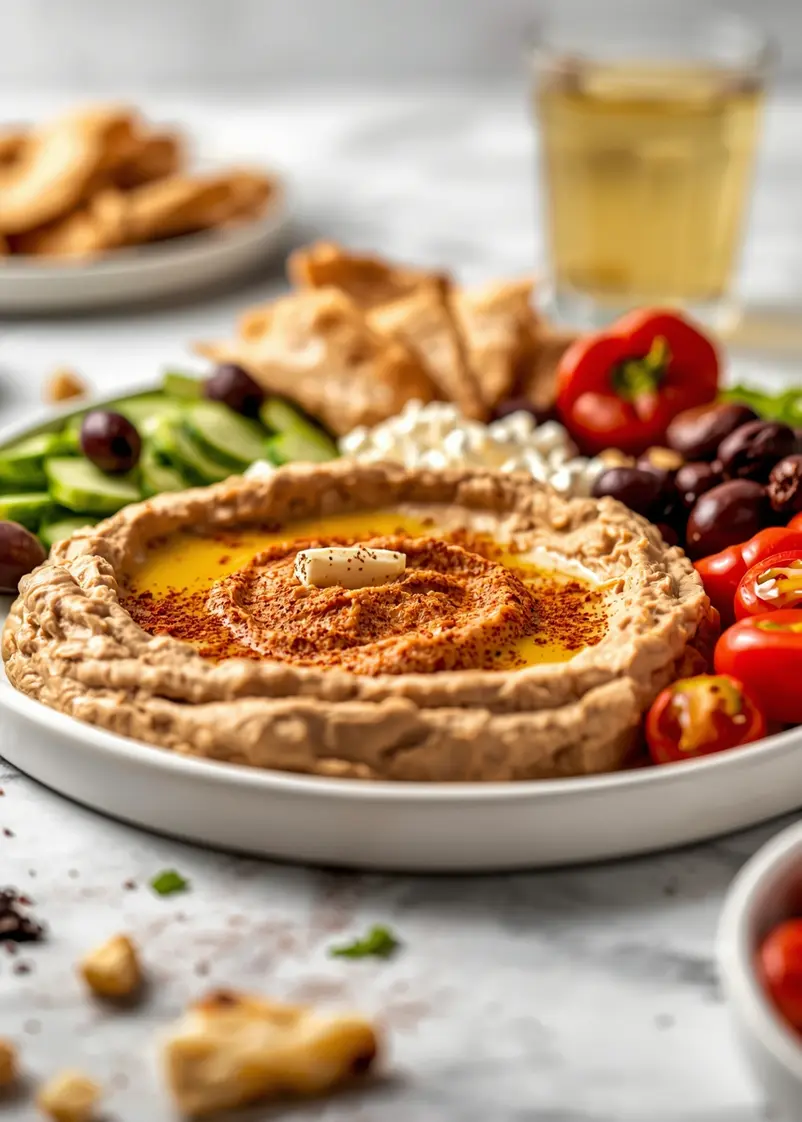
4. Transfer the hummus to a shallow serving bowl or platter, then use the back of a spoon to create a small well in the center. This well isn’t decorative—it’s functional space for drizzling extra olive oil and creating a visual anchor that says “start here.” I’ve watched Sandra arrange the vegetables around this well three times now, and each time she says it looks more intentional than it actually was.
5. Arrange the pita wedges around the platter’s outer edge, then build your rings inward: cherry tomatoes and cucumber sticks first, then the roasted red peppers and olives, and finally the feta scatter across the top. This isn’t random—the colors move from light to dark, which keeps the eye moving around the platter instead of getting stuck in one spot.
6. Drizzle the top of your hummus well with additional olive oil, then sprinkle a pinch of smoked paprika across the surface. This isn’t just garnish; it’s an invitation. The paprika color says “this is intentional” and “this is worth trying” before anyone takes a bite.
Once everything’s arranged, you’ve got a party sharing platter that’s ready to set down and disappear.
Serving ideas for homemade hummus sharing platter recipe
This easy crowd dip shines when you know exactly where to position it.
Outdoor summer gathering anchor
Set this homemade hummus sharing platter on a low table near the entrance where guests land first. The arrangement signals abundance and intentionality, which sets the tone for the entire evening. A sharing summer appetizer like this one becomes the thing people remember you for—not the main course, but this.Lunch box addition
Cut extra pita and pack small containers of the hummus for tomorrow’s lunch spread. The party sharing platter format teaches you how to build balanced bites, which means your weekday lunch tastes like you actually planned something instead of grabbed something.Wine pairing table
Pair this with white wine or light rosé because the tahini and lemon punch clean when the wine’s not heavy. The Mediterranean flavors in the hummus, olives, and feta create a natural conversation with crisp wine that makes everyone’s glass disappear faster.The beauty is you can scale this down to four people or stretch it to feed twelve without changing your approach.
Frequently asked chickpea platter questions
Can I freeze hummus for later?
Yes, hummus freezes well for up to three months in an airtight container. Thaw it overnight in the refrigerator and stir well before serving, though the texture sometimes becomes slightly grainier after freezing.What’s the best tahini substitute for this homemade hummus sharing platter?
Almond or cashew butter works as a one-to-one swap when you don’t have tahini. You’ll lose some of the traditional nuttiness, but the homemade hummus sharing platter will still be delicious and hold together properly.How do I reheat this if it gets cold?
You don’t reheat—serve it cold or at room temperature straight from the refrigerator. If it’s been sitting out for more than two hours, move it back to cool storage to keep the flavors bright.Can I make this summer appetizer less rich or feed fewer people?
Absolutely—cut all ingredient quantities in half for a four-person version. The homemade hummus sharing platter method stays exactly the same, just with proportionally smaller components.Final thoughts on Mediterranean chickpea dip
There’s something about watching a platter completely disappear that feels like winning. This homemade hummus sharing platter isn’t complicated—it’s just intentional, and that’s what makes people keep coming back to it year after year.
Sandra mentioned last week that she’s made this three times since early June, and each time the reaction at the table was exactly the same: silence first, then questions about how she did it. The confidence comes from knowing what you’re making actually works, because the contrast between the smooth center and every texture around it does the heavy lifting for you.
This is your sharing crowd recipe now—the one you bookmark and return to every time someone says “just bring something.” It scales, it travels, it sits at room temperature without complaint, and it tastes like you know what you’re doing in the kitchen even if you made it in 15 minutes flat.
Challenge: Make this for your next gathering and tell me—how long did it actually last on the table? I’m betting the leftovers never make it to tomorrow.
homemade hummus sharing platter
Ingredients
Method
- Add the drained chickpeas, tahini, lemon juice, minced garlic, cumin, and smoked paprika to your food processor. Pulse first—I learned this the hard way when I hit blend full-speed and ended up with chickpea dust instead of texture. You want the mixture to move around the bowl, not stick to the sides in a panicked clump.
- Stream the 2 tablespoons of olive oil through the feed tube while the processor runs at medium speed. This is where the magic happens: the oil emulsifies into the mixture, creating that cloud-like consistency that makes people close their eyes while eating. Don’t pour it all in at once because you’ll break the texture and end up with grainy instead of smooth.
- Taste, then season with salt to your preference. I usually add about 1/2 teaspoon, but everyone’s salt tolerance is different—taste before you commit. The lemon juice will have already begun the preservation process, so this homemade hummus sharing platter stays fresh longer than you’d expect in a refrigerator.
- Transfer the hummus to a shallow serving bowl or platter, then use the back of a spoon to create a small well in the center. This well isn’t decorative—it’s functional space for drizzling extra olive oil and creating a visual anchor that says “start here.” I’ve watched Sandra arrange the vegetables around this well three times now, and each time she says it looks more intentional than it actually was.
- Arrange the pita wedges around the platter’s outer edge, then build your rings inward: cherry tomatoes and cucumber sticks first, then the roasted red peppers and olives, and finally the feta scatter across the top. This isn’t random—the colors move from light to dark, which keeps the eye moving around the platter instead of getting stuck in one spot.
- Drizzle the top of your hummus well with additional olive oil, then sprinkle a pinch of smoked paprika across the surface. This isn’t just garnish; it’s an invitation. The paprika color says “this is intentional” and “this is worth trying” before anyone takes a bite.